Amazon Echo and Particle Photon
Overview
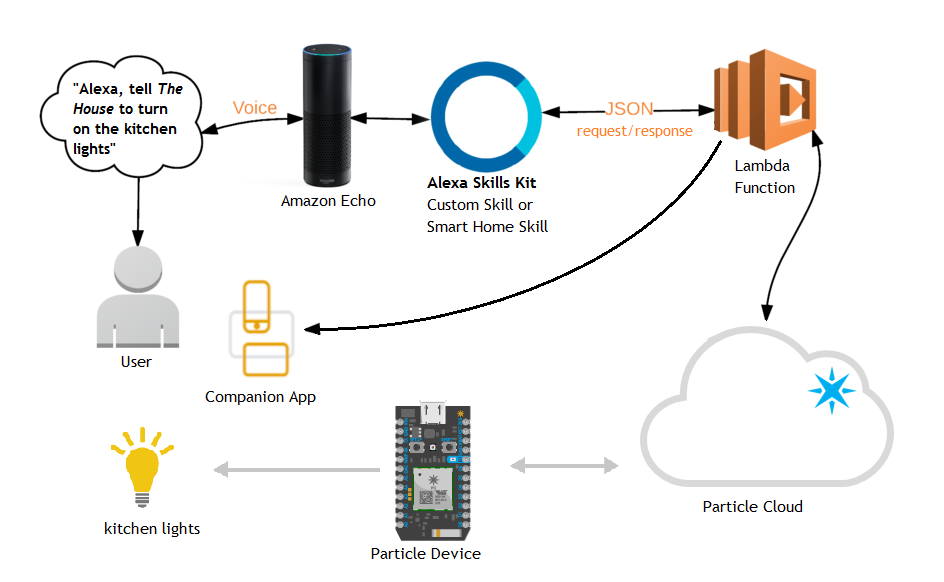
First, the user issues a voice command to the Amazon Echo device. The device sends the audio to Amazon's Alexa Voice service which 'tokenizes' the speech into a json format. It then gets routed to the specified endpoint (our AWS Lambda Function) and passes the tokenized values into the function call to Particle's API. This triggers our Particle Photon device to change state and return an int to the Lambda Function. The Lambda Function finishes the request and sends a voice response back for the Amazon Echo device along with an optional reference card for the companion app.You can view the code and other documentation here:
https://github.com/arturju/alexaLights
Schematics
Let's start at the last step of the process; the Particle Photon. I wanted to control an LED strip which needed a voltage higher than what the Particle Photon could provide so I got a power supply that could provide 24V for the LED strip and 5V for for the board. To switch this load I used a TIP120 Darlington transistor and wired it to the board according to the schematics. Finally, a PIR sensor allows the controller to automatically turn the lights on/off if certain timers have elapsed.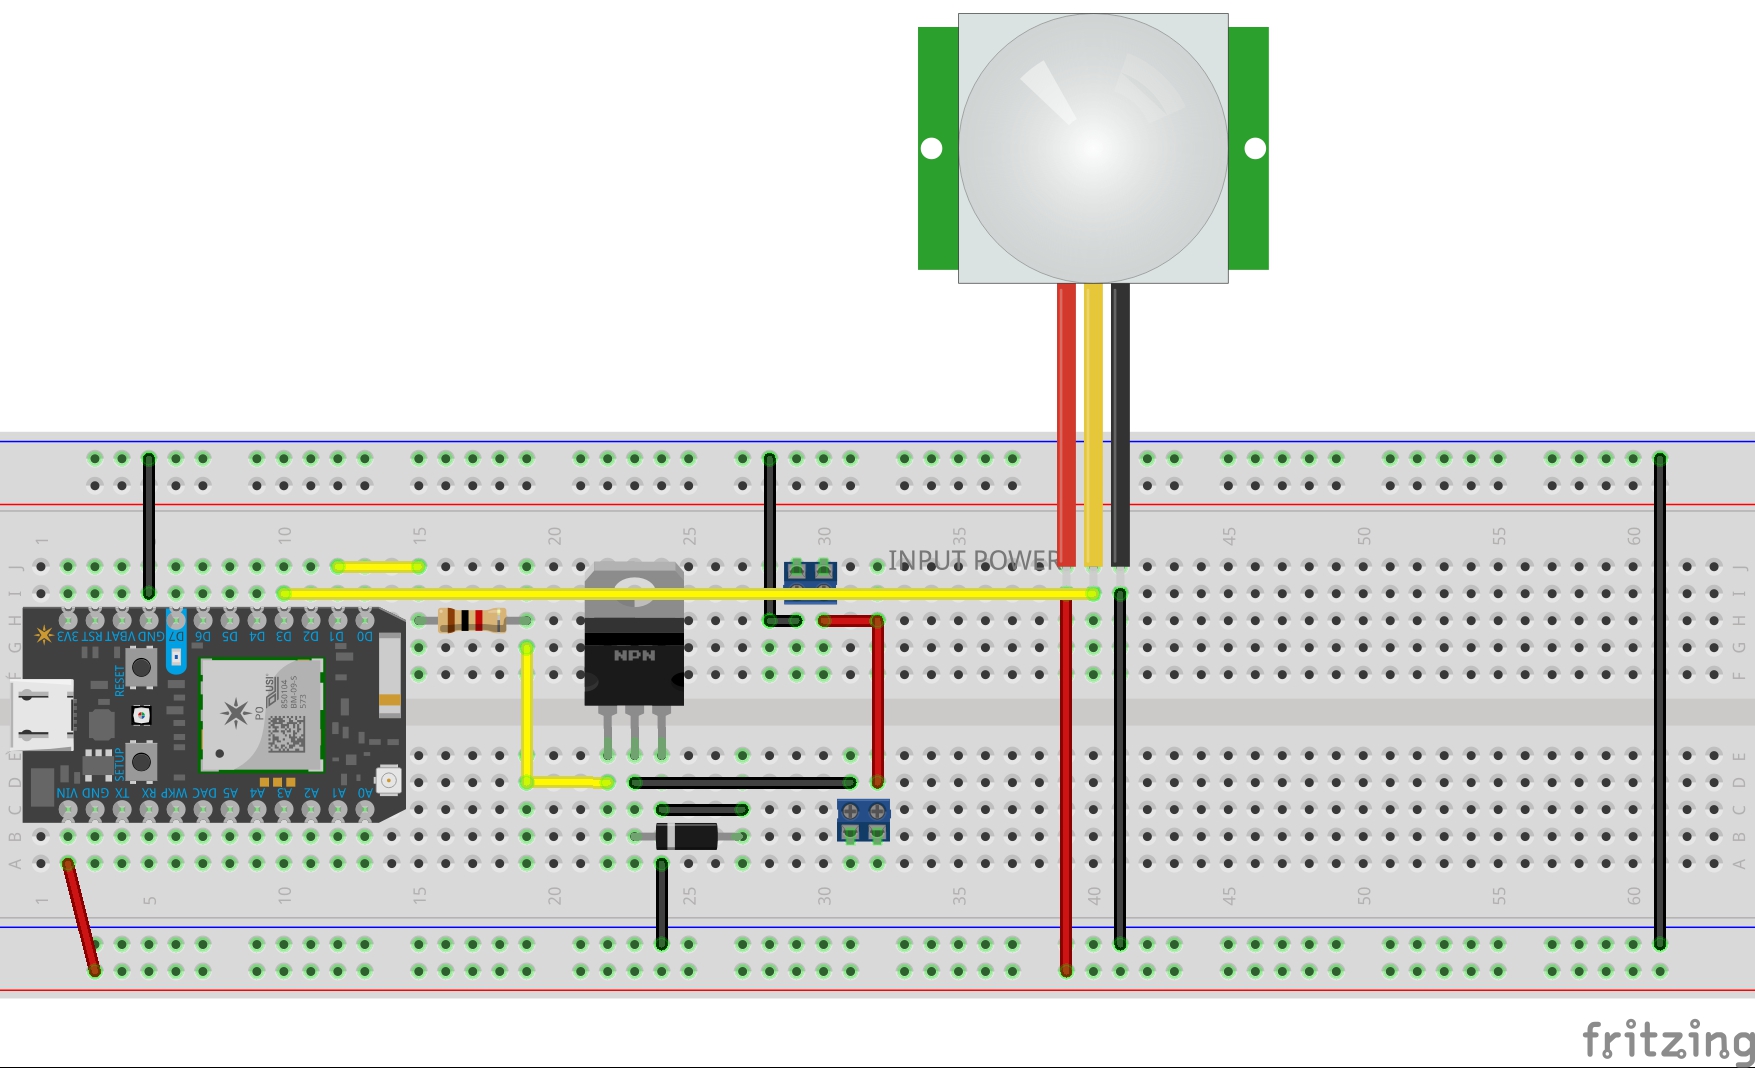
Lambda Function
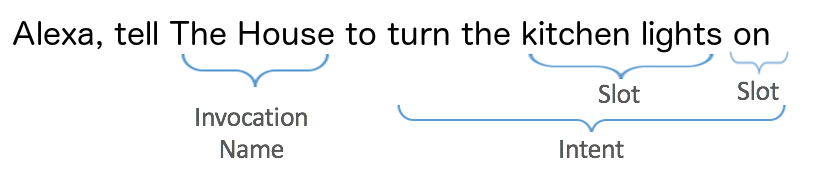
I won't go into detail on how to create an AWS account (you can see the tutorials on the references for more details) but I'll touch on some points that I think are important. The relevant files for the Lambda Function are in the customSkill/src/ directory (more about Smart Home Skills in a bit). You will need to edit the sampleConfig.js file with your Particle board's information, your deviceID and acccesToken, and rename it to config.js. The main code is in index.js file but before we take a look at it we must understand the structure of an Alexa Custom Skill command. A command consists of a wake word, Alexa, an invocation name and an intent with optional slots.
The Lambda Function receives the aforementioned parameters in a JSON format (more on this later), switches to the appropiate case based on the intent, uses the slots to construct a message, and sends it off to the Particle board. Many Intents can be assigned to the Custom Skill giving it much more versatility than a Smart Home Skill. We can also design a response card to the companion Alexa App that can display extra information for the user. The fastest way to get up and running is to select AlexaSkill.js, config.js, index.js zip them, and upload directly to the Lambda Function page. For the user, the main difference between a Custom Skill and a Smart Home Skill is the way in which it's called. A Smart Home Skill does not need an invocation name, so our command would be 'Alexa, turn the Kitchen Lights On'. This is much easier to remember but unfortunately the backend limits the responses back to the users and requires an OAuth to authenticate with your device making things a bit more complicated. I was not able to succesfully authenticate with my Particle device but I put the code up anyways in case anyone wants to try it. That's in the smartHomeSkill/ directory.