Embedded Web Server

Objective
My goal with this project was to set up a basic arduino web server so that I would be able to control and see the status of 3 lights connected to relay modules. The first step is to set up the functions that the arduino will use to switch the pins HIGH or LOW. I wanted the light to be either On, Off, or Blinking so I set up global arrays to represent the status of the light. This way, a function could be called every time through the main loop updating the pins based on the status of the array.We also need a function that will return the status of the lights when requested by the client. A basic loop through all the lights returning '1' if On, '2' if Blinking, and '3' if Off will suffice. The number sequence returned can be decoded by the client later.
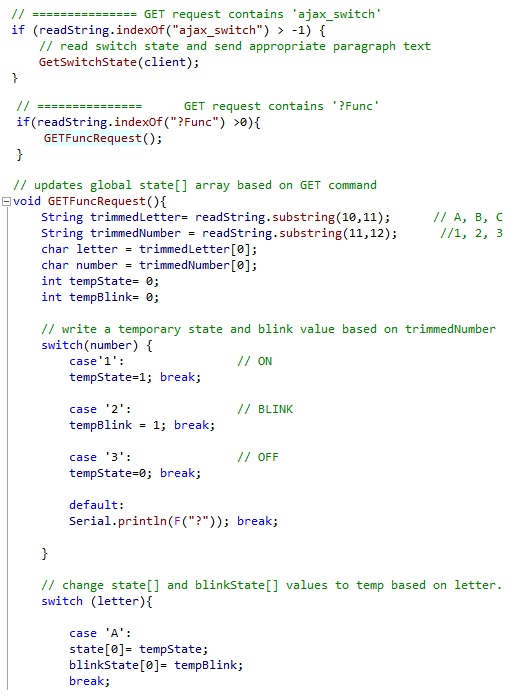
Receiving HTTP Commands
Next we set up the arduino to handle specific GET requests. When the request contains 'ajax_switch', the arduino will execute GetSwitchState(). If it reads '?Func' it will execute GETFuncRequest() which will update the global arrays based on the letter and number following it. If neither of those 2 are read by the server it will return the html page.Another important thing to add is the Access-Control-Allow-Origin: * parameter on the HTTP response header. This tells the server to accept connections from other servers. This is useful because the arduino's memory is limited and it becomes complicated to develop a nice front-end to display all the data. With this option open we can use a secondary server to send and receive all the commands.
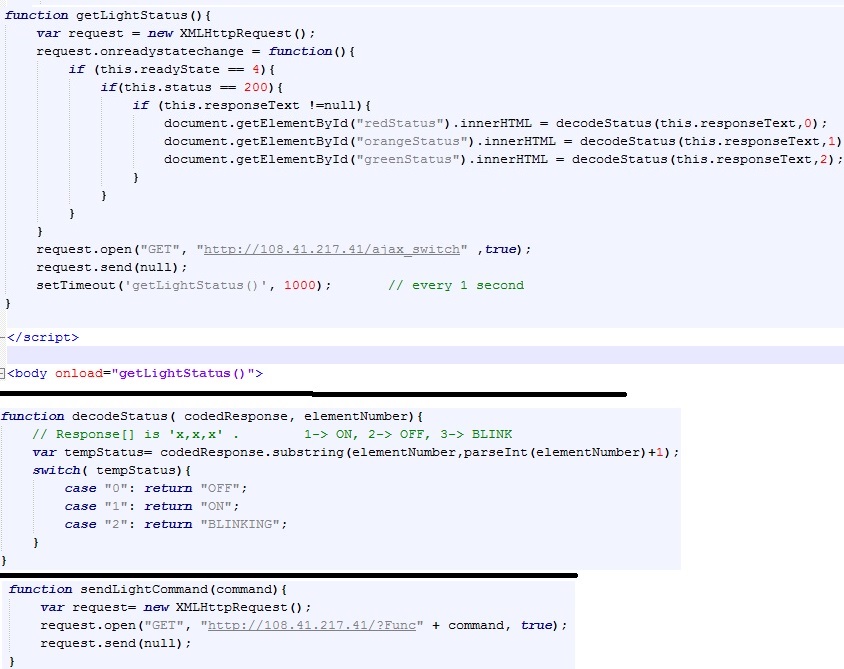
Secondary Server Configuration
Next we must set up the code on the secondary server that will communicate and send/receive commands from the arduino server. Only three basic functions are needed: one to request the light status from the arduino and update text, another one to decode the response, and one to send a command to change the pin status (A1,A2,A3, B1.. etc).Once the functionality of the commands was tested I focused adding some styling to the page. This method is not constrained by the arduino's memory or the utilization of some pins from the SD card.
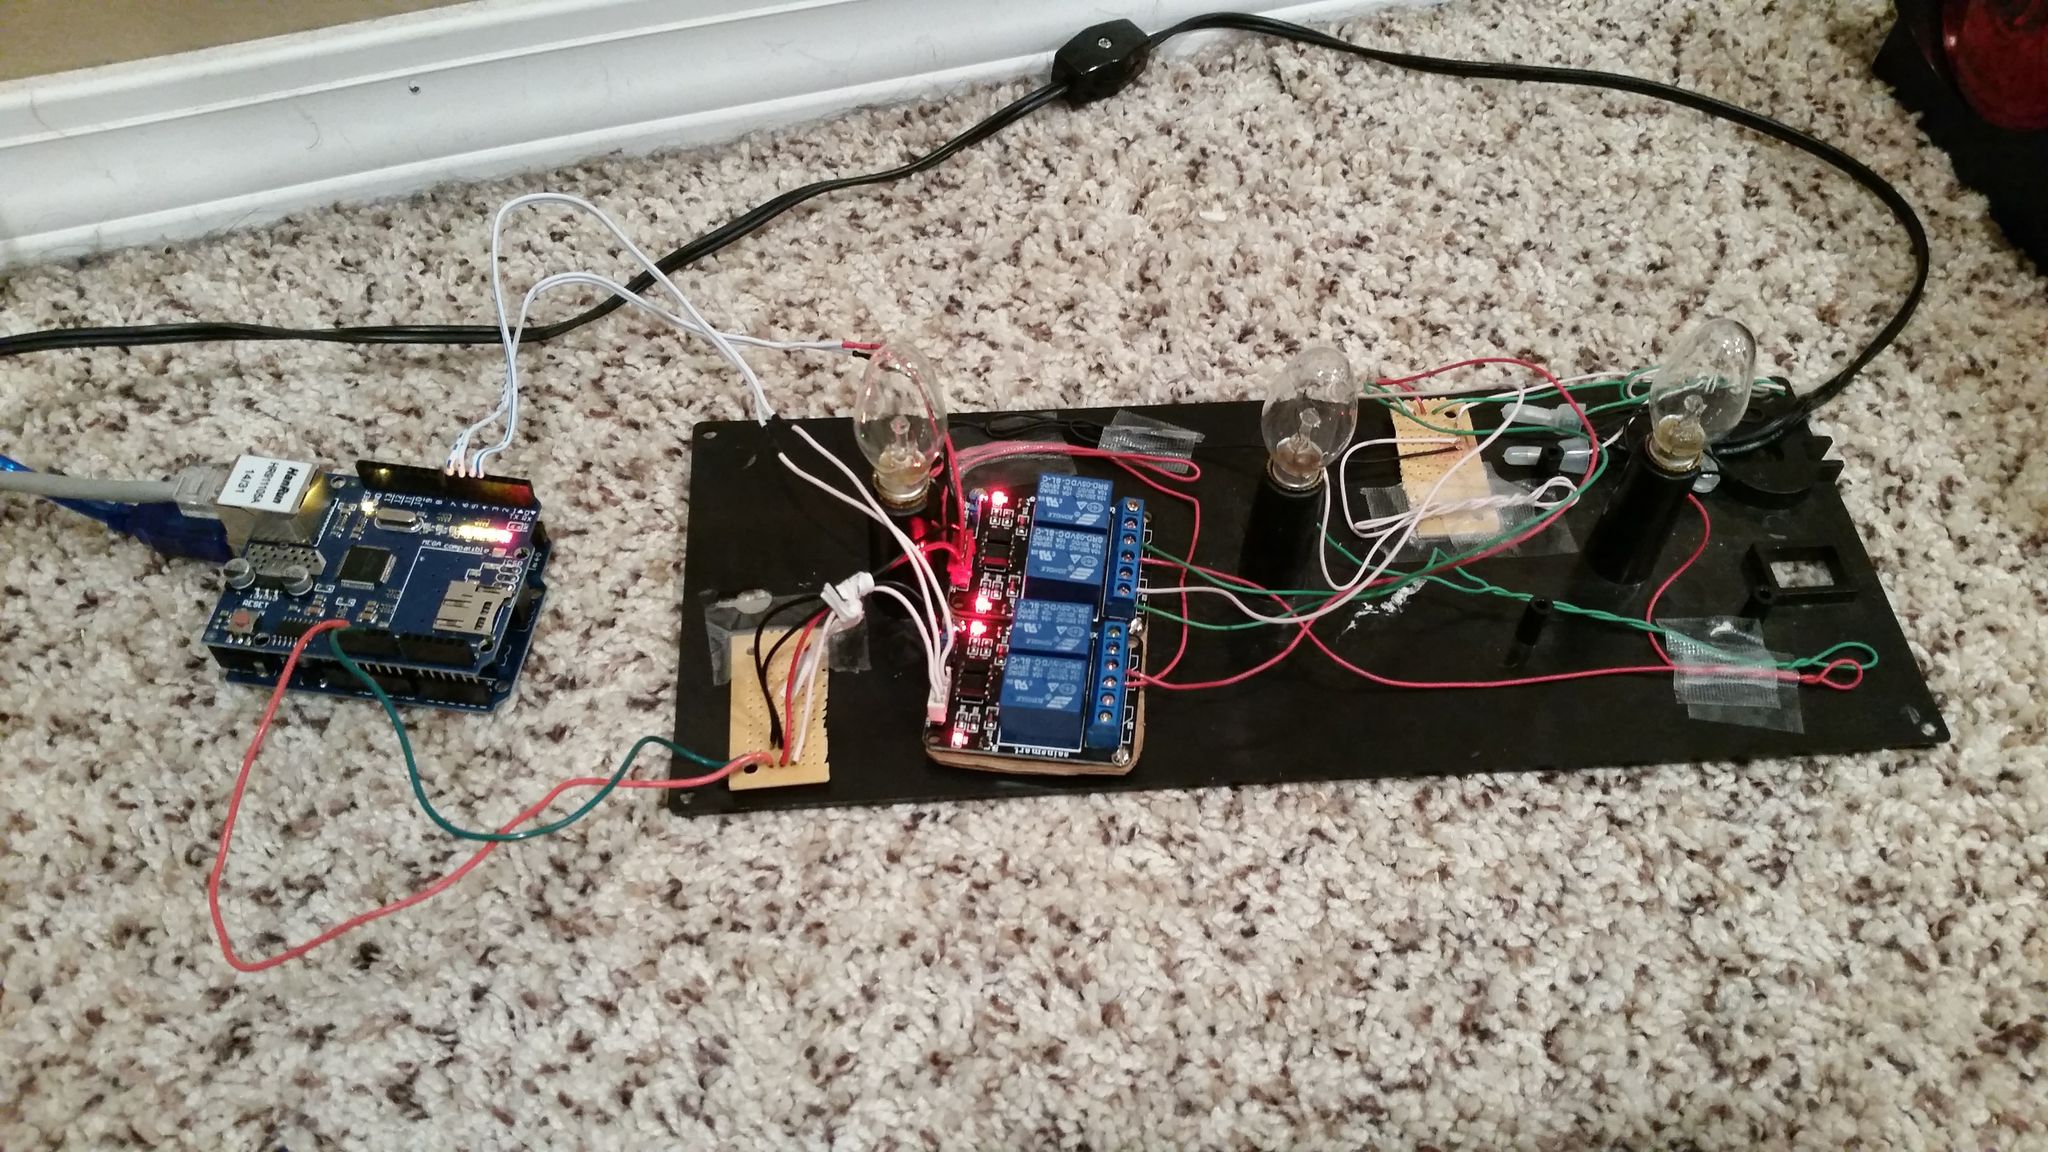
Wiring it together
For simplicity and a quick proof of concept I hooked up the pins to a relay some relay modules and connected it to a traffic light I won at an arcade a few years back. The relay module is 5V trigger and is optically isolated so it can be triggered from the Arduino directly while remaining protected from any surges when the relay turns back off.To keep the wiring more organized I soldered the components to a perfboad- seems to have only helped a bit.
Ready, Set, Go!
This short video shows the basic functionality of the system. I used my laptop's webcam to show the lights changing and a browser as a client (window on the right). There is a collapsible navigation bar that shows the lights and their status. Because the client is using AJAX to request the status from Arduino server, it will also update the status when they are changed from another client - go to 0:40 for demonstration.
This project was a nice proof of concept and can be further developed to do much more. There are a few more things i'd like to add to this project. To name a few: solid state switches (relays are too loud), a zero cross detection circuit so I can dim the AC lights programatically, photoresistors to sense ambient lighting conditions and adjust light intensity.